djangoのプロジェクトのスタートが終わったところから、modelsの実装、そしてhtml側での表示までをやってみます。
・django2.2
・python3.8
環境ができたところで
$django-admin startproject myapp
|
1 2 3 4 5 6 7 8 |
myapp/ manage.py myapp/ __init__.py settings.py urls.py asgi.py wsgi.py |
myappプロジェクトが作成できたら下記コマンドを実行します。
$python manage.py runserver
にアクセスし、下記画面が出ていればOKです。
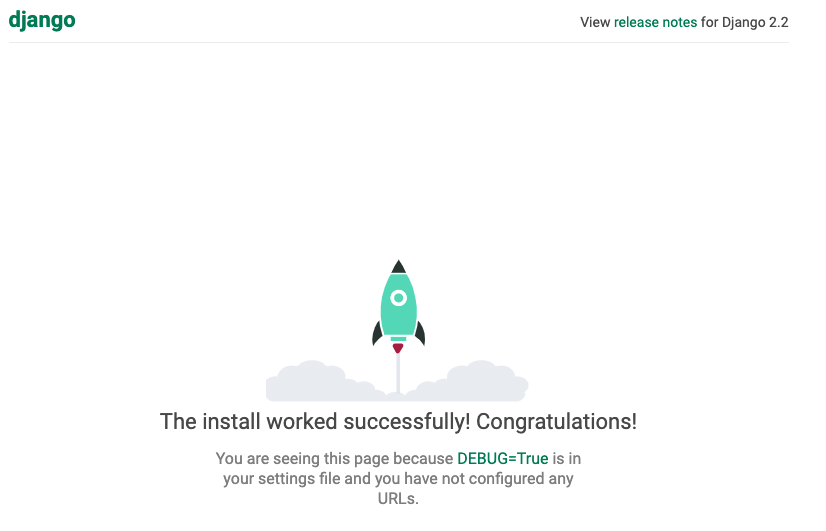
ここからスタートします。
コンテンツ
my_friendアプリの作成
まずはアプリを作成します。
プロジェクトとアプリの違いに関しては公式から確認下さい↓
https://docs.djangoproject.com/ja/1.11/intro/tutorial01/
それではコマンドを打ち込みます。
$python manage.py startapp my_friend
こんなディレクトリ構造でアプリが生成されました。
|
1 2 3 4 5 6 7 8 9 |
my_friend/ __init__.py admin.py apps.py migrations/ __init__.py models.py tests.py views.py |
settings.pyの設定
まずは、my_friendアプリを作成したのでsettings.pyの下記場所にdjango-contrib.my_friendを追記します。
‘my_friend’だけでもいいのですが、これは古い書き方で細微な問題もありますので、my_friend.apps.MyFriendConfigのような書き方をします。
<settings.py>
|
1 2 3 4 5 6 7 8 9 |
INSTALLED_APPS = [ 'my_friend.apps.MyFriendConfig', 'django.contrib.admin', 'django.contrib.auth', 'django.contrib.contenttypes', 'django.contrib.sessions', 'django.contrib.messages', 'django.contrib.staticfiles', ] |
言語も下記のように変えておきます。
|
1 2 3 |
LANGUAGE_CODE = 'en-us' ↓ LANGUAGE_CODE = 'ja' |
時刻も日本時間に変更します。
|
1 |
TIME_ZONE = 'Asia/Tokyo' |
Friendモデルクラスの作成
友達登録フォームなので、このような形にします。
<my_friend/models.py>
|
1 2 3 4 5 6 7 8 9 10 11 |
from django.db import models class Friend(models.Model): name = models.CharField(max_length=100) mail = models.EmailField(max_length=100) gender = models.BooleanField() age = models.IntegerField(default=10) birthday = models.DateField() def __str__(self): return '<Friend:id' + str(self.id) + ',' + self.name + str(self.age) + ')>' |
そしてマイグレーションをします。
% python manage.py makemigrations
Migrations for 'my_friend':
   my_friend/migrations/0001_initial.py
     - Create model Friend
これでマイグレーションファイルを作成できました。
続いてマイグレーションの実行します。イメージとしてはマイグレーションで生成したファイルを使えるように本体に流し込むイメージです。
% python manage.py migrate
Operations to perform:
   Apply all migrations: admin, auth, contenttypes, my_friend, sessions
 Running migrations:
   Applying contenttypes.0001_initial… OK
   Applying auth.0001_initial… OK
   Applying admin.0001_initial… OK
   Applying admin.0002_logentry_remove_auto_add… OK
   Applying admin.0003_logentry_add_action_flag_choices… OK
   Applying contenttypes.0002_remove_content_type_name… OK
   Applying auth.0002_alter_permission_name_max_length… OK
   Applying auth.0003_alter_user_email_max_length… OK
   Applying auth.0004_alter_user_username_opts… OK
   Applying auth.0005_alter_user_last_login_null… OK
   Applying auth.0006_require_contenttypes_0002… OK
   Applying auth.0007_alter_validators_add_error_messages… OK
   Applying auth.0008_alter_user_username_max_length… OK
   Applying auth.0009_alter_user_last_name_max_length… OK
   Applying auth.0010_alter_group_name_max_length… OK
   Applying auth.0011_update_proxy_permissions… OK
   Applying my_friend.0001_initial… OK
   Applying sessions.0001_initial… OK
これでDBを操作できる準備は整いました。
管理ツールからFriendを登録してみる
my_friend/admin.py
|
1 2 3 4 |
from django.contrib import admin from .models import Friend admin.site.register(Friend) |
これで管理ツール側でDBを操作できるようになります。
管理ツールに入り操作する
管理ツールを使うためにも、スーパーユーザーを作成する必要があります。
下記コマンドで作成します。Usernameやpasswordを聞かれると思いますので設定してください。
% python manage.py createsuperuser
設定ができたら早速ログインしてみます。
にリダイレクトし、先ほど設定したUsernameとPASSでログインします。
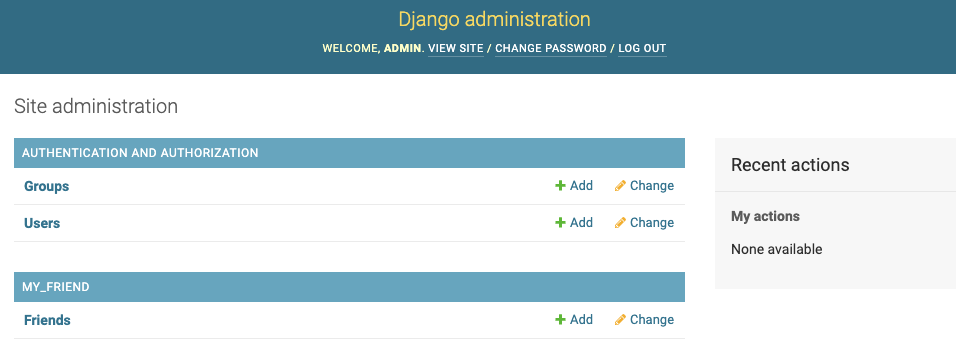
そして早速何か登録してみます。
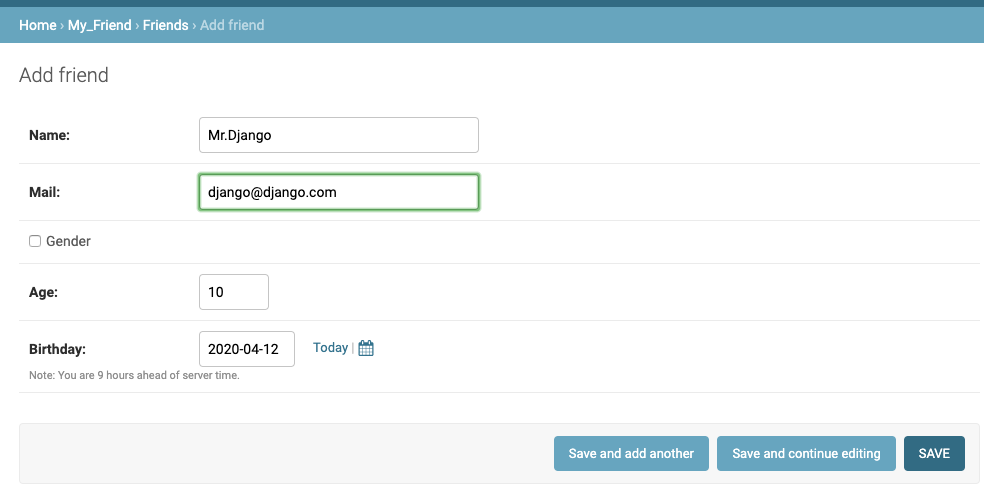
右下のSAVEを押して、サクセスできれば一先ずOKです。

htmlに表示する
最初にパスの設定を行います。
myapp/urls.py
|
1 2 3 4 5 6 7 |
from django.contrib import admin from django.urls import path, include urlpatterns = [ path('admin/', admin.site.urls), path('', include('my_friend.urls')), ] |
my_friend/urls.py
|
1 2 3 4 5 6 7 8 |
from django.urls import path from . import views app_name = 'my_friend' urlpatterns = [ path('', views.index, name='index'), ] |
my_friend/views.py
|
1 2 3 4 5 6 7 8 9 10 11 12 13 14 15 |
from django.shortcuts import render from django.http import HttpResponse from .models import Friend def index(request): # get時 if request != 'POST': data = Friend.objects.all() context = { 'title': '友達のデータ', 'message': '登録一覧になります', 'data': data, } return render(request, 'my_friend/index.html', context) |
またmy_friendアプリ直下にtemplatesディレクトリとindex.htmlファイルを作成します。ディレクトリ構造は下記になります。
my_friend/templates/my_friend/index.html
そして、index.htmlに作成したファイルを表示できるかと思います。
|
1 2 3 4 5 6 7 8 9 10 11 12 13 14 |
{% load static %} <!DOCTYPE html> <html> <head> <meta charset="utf-8"> <meta name="viewport" content="width=device-width"> <title>{{title}}</title> <link rel="stylesheet" href="{% static 'my_friend/css/style.css' %}" /> </head> <body> <h1>{{title}}</h1> <p>{{data}}</p> </body> </html> |
※文字化けが対応できておりません。< は全て < となります。
cssも作成します。
パスは
my_friend/static/my_friend/css/style.css
|
1 2 3 4 |
body{ color: gray; margin: 20px; } h1{ color: #ff0000; opacity: 0.3; font-size: 36px; } p{ margin: 10px; } a{ color:blue; text-decoration: none; } |
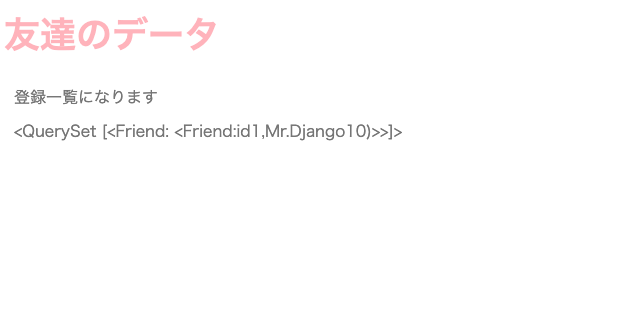
それではhttp://localhost:8000/ へアクセスしてみます

とりあえず、表示ができました。先ほど管理ツール箇所で登録した内容がうまく表示されています。
長くなったのでこの記事はここでストップします。
次回は、ここからhtml側でデータの登録を行うコードを書いていきます。






コメントを残す